
iOS Setup Method

We guide you through the eSIM setup method on iPhone step by step.
It is divided into two: settings to do before departure and settings to do after you arrive. Please follow the steps below to set it up.
What to Prepare
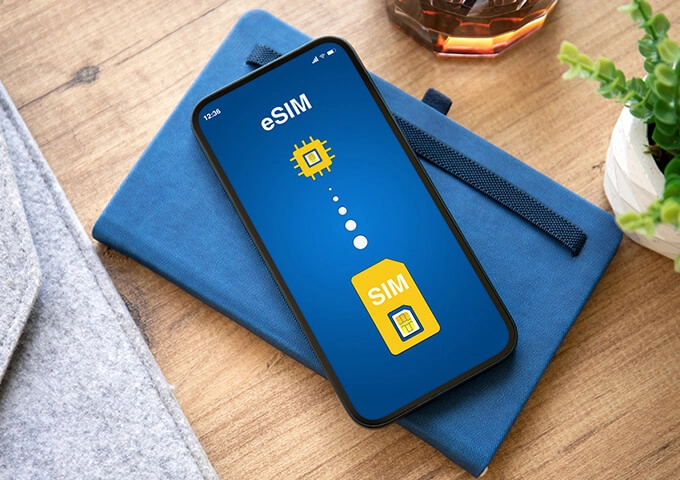
An eSIM-compatible Device

An Internet Connection
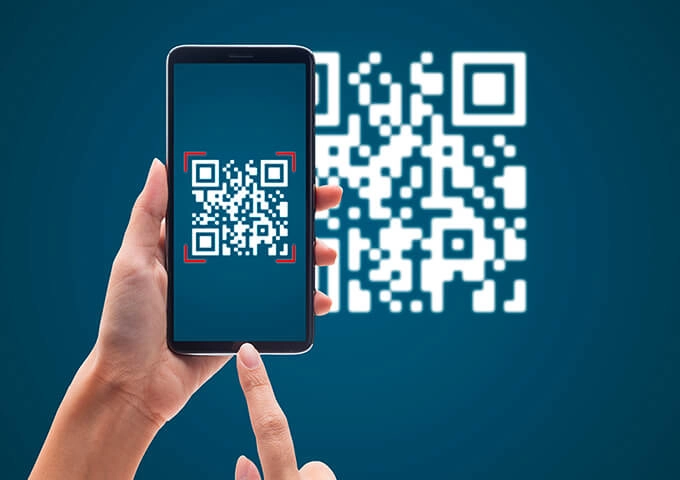
QR Code
How to Set Up Your eSIM (iOS)
Before you leave
STEP 1~10
After you arrive
STEP 11~17
Precautions When Downloading the eSIM
- Only unlocked smartphones can be used.
- The QR code can be used only once.
- A QR code that has been installed once cannot be downloaded again.
- Please install in a location with good reception where data can be used.
- Please note that closing the screen during installation or switching to another app may stop the download partway and cause it to fail.
- Do not delete an installed eSIM before you start using it.
Settings to Do Before Departure (iOS)
STEP1
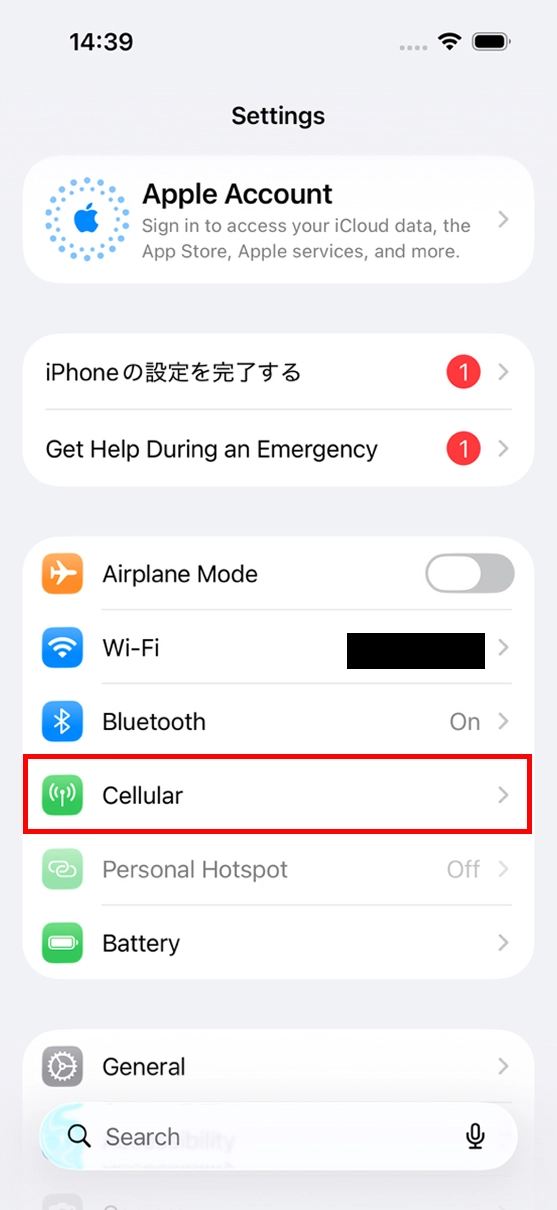
Tap "Settings" → "Cellular".
STEP2
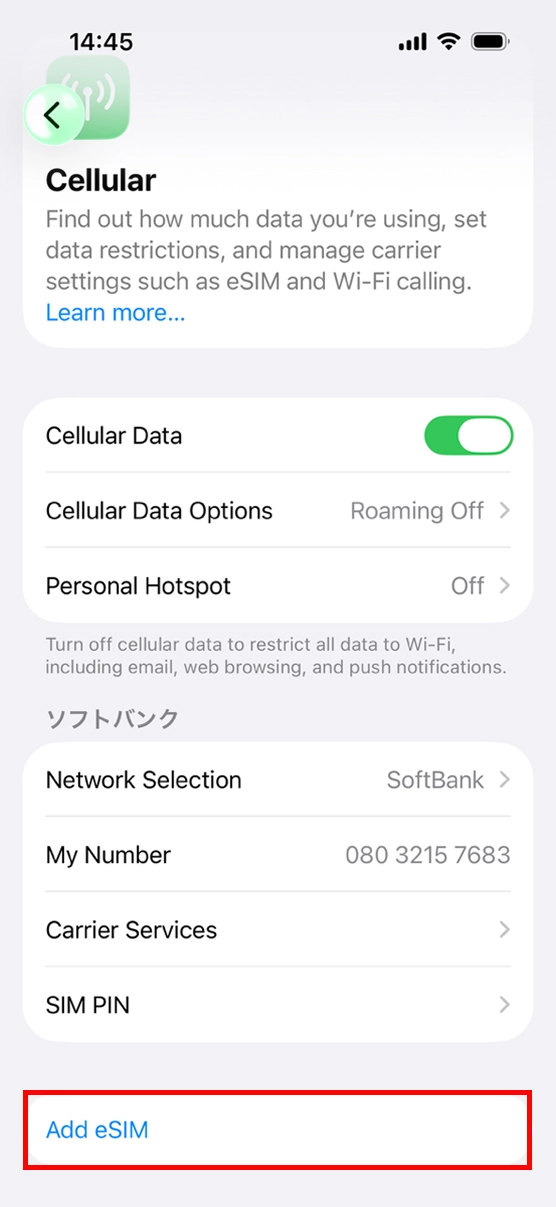
Tap "Add eSIM".
STEP3
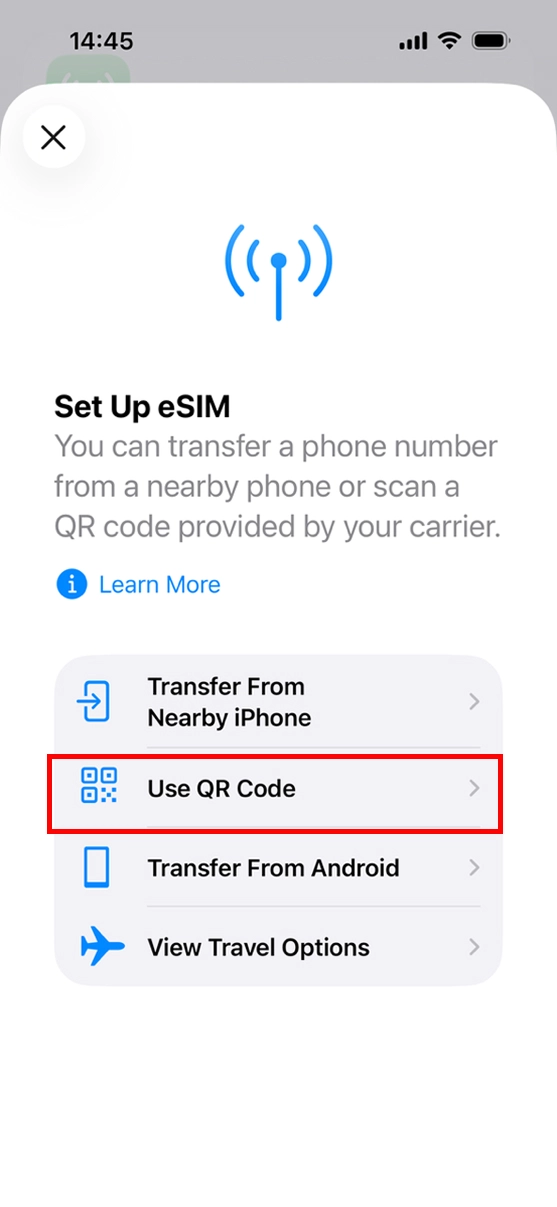
Tap "Use QR Code".
STEP4
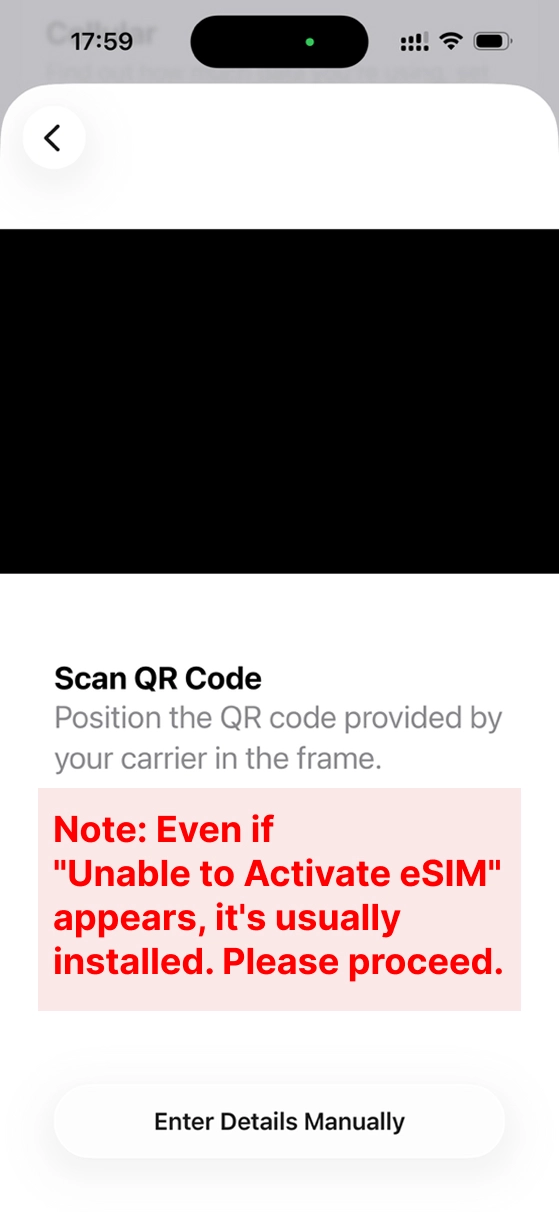
Scan the QR code that arrived by email at the time of purchase with your camera.
Note: If the camera is broken or scanning could not be done, go to the next page
STEP5
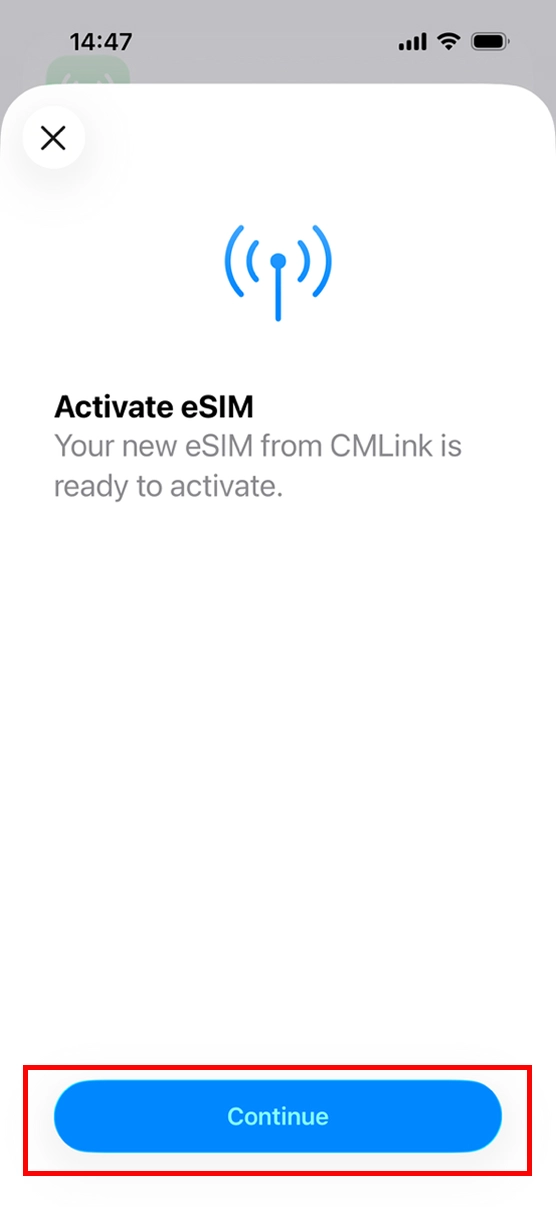
Tap "Continue".
STEP6
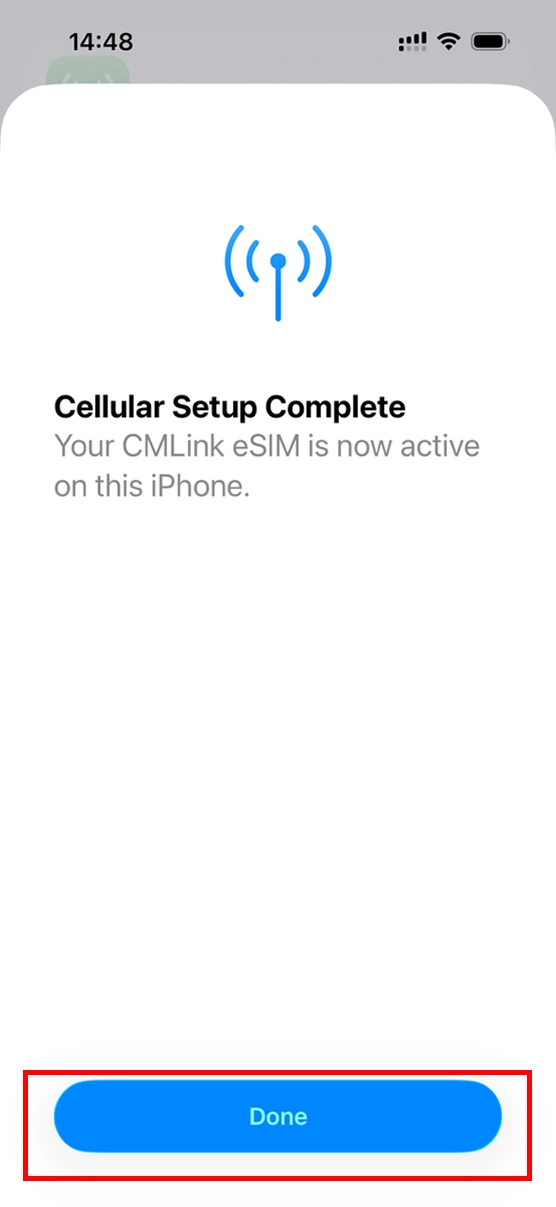
After cellular setup is complete, tap "Done".
STEP7
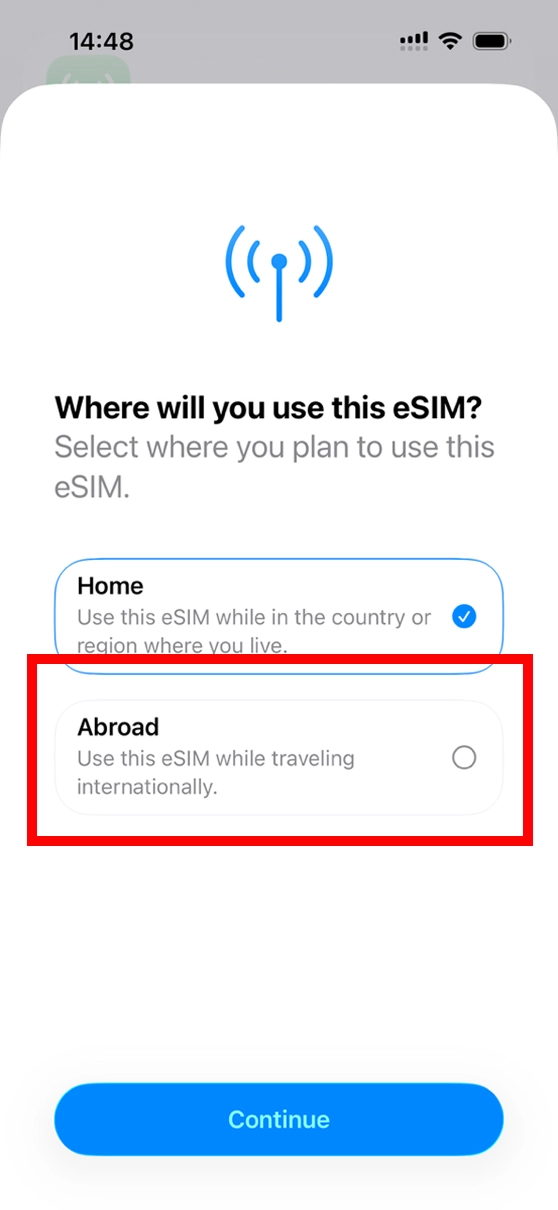
You can change the label of the cellular plan you downloaded.
Tap "Continue".
STEP8
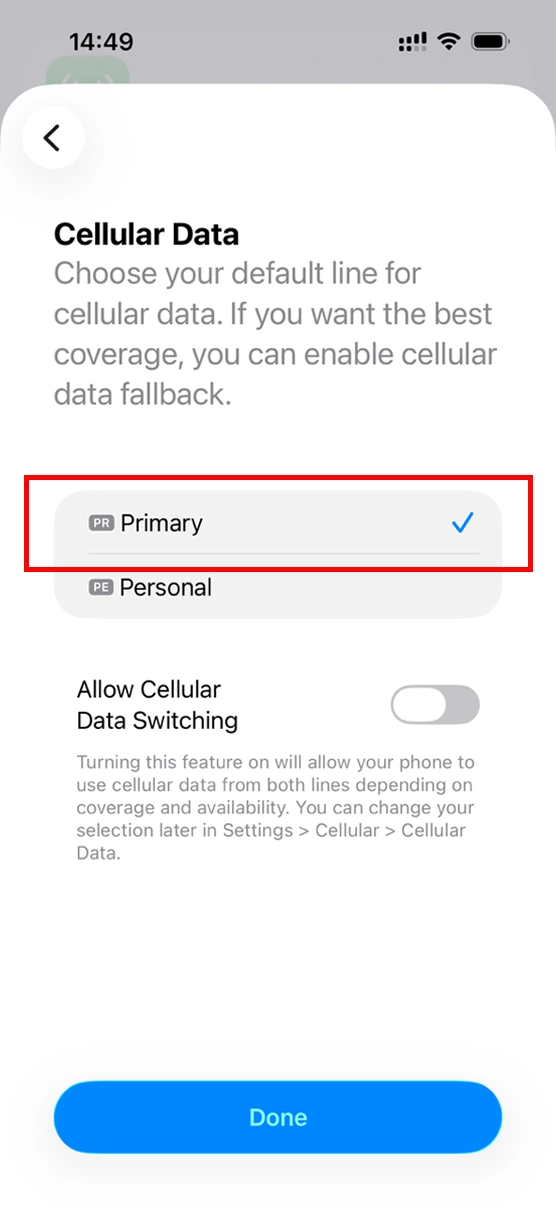
For the default line, select "Primary" and tap "Done".
Note: Do not turn on "Allow Cellular Data Switching".
STEP9
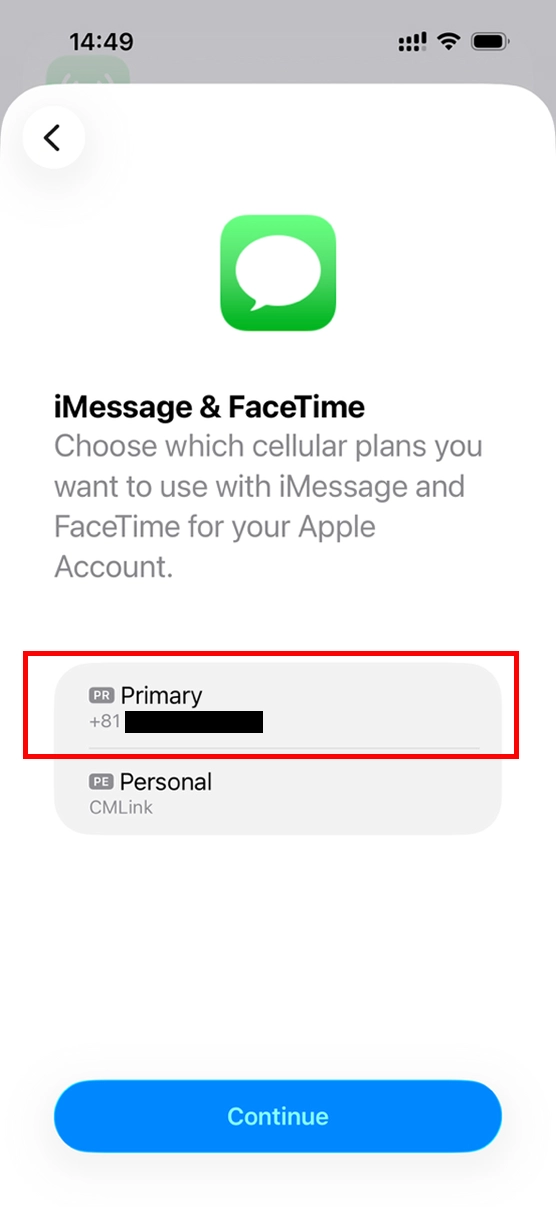
Without setting up iMessage and FaceTime, keep the primary line and tap "Continue".
STEP10
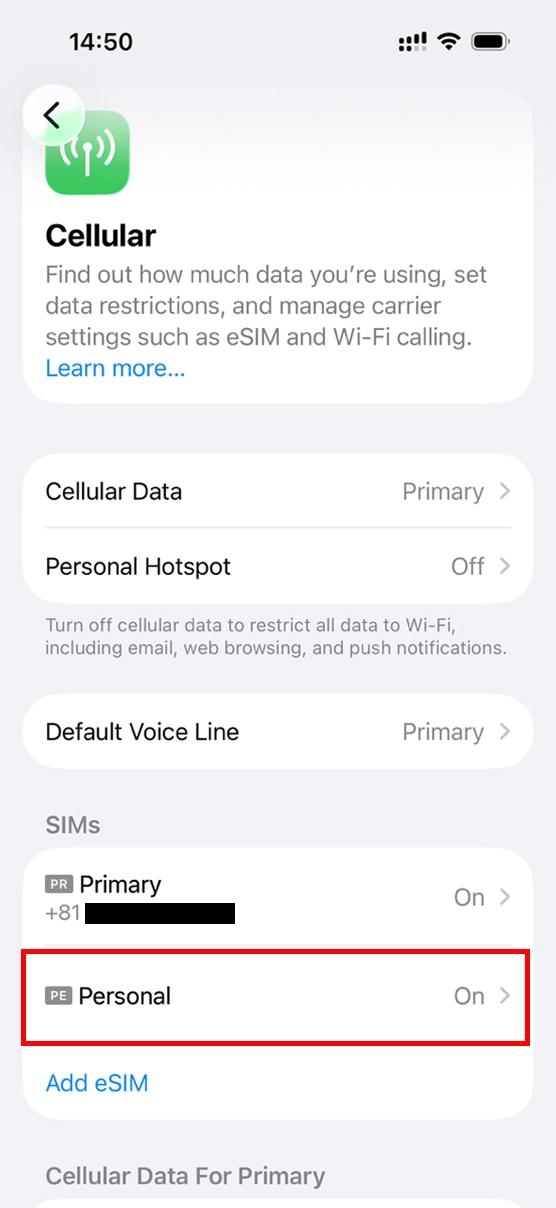
If a new eSIM appears in the ON state separately from the primary line, the download is complete. Keep it off until you reach your destination. This completes the pre-departure setup.
Can't scan the QR code? (your camera is broken, you have no other device, or the printout wasn't ready in time)
Note: Continued from STEP4
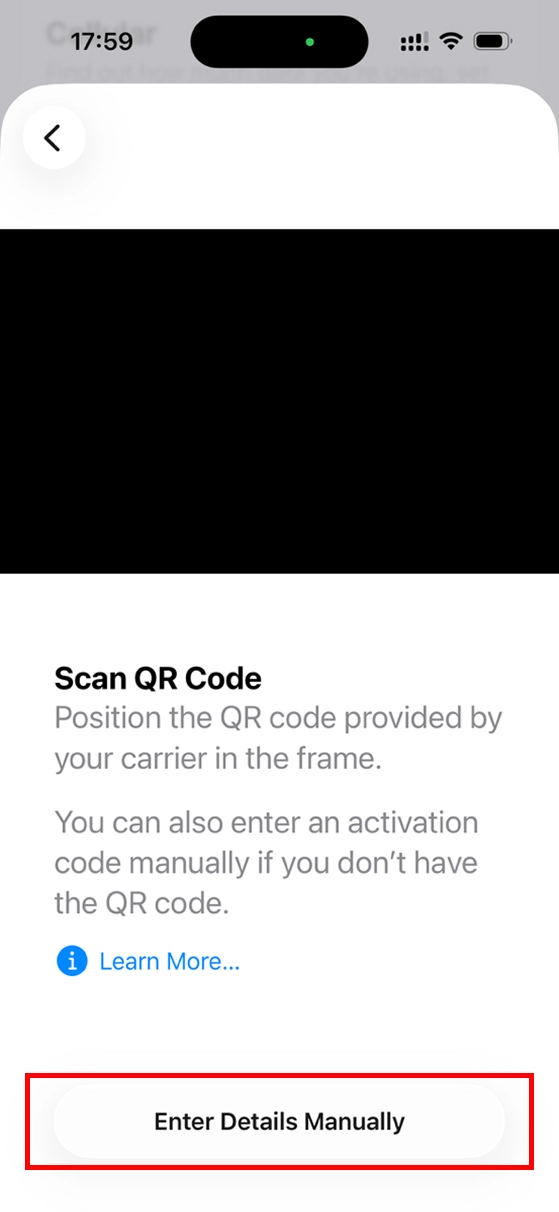
Tap "Enter Details Manually".
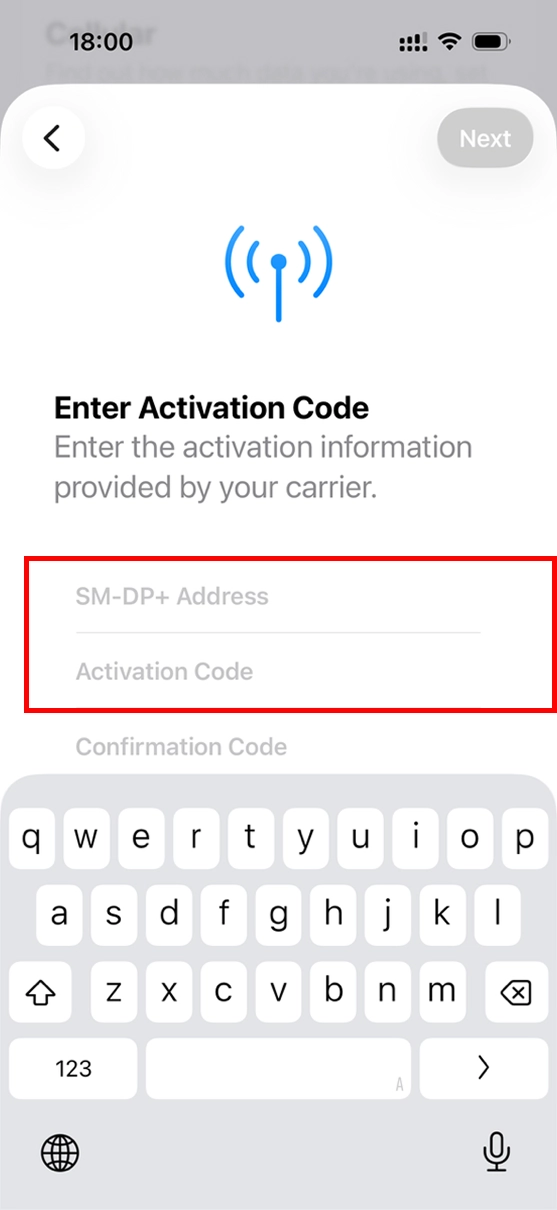
Enter the "SM-DP+ Address" and "Activation Code" listed in the email.
Settings to Do After You Arrive (iOS)
STEP11
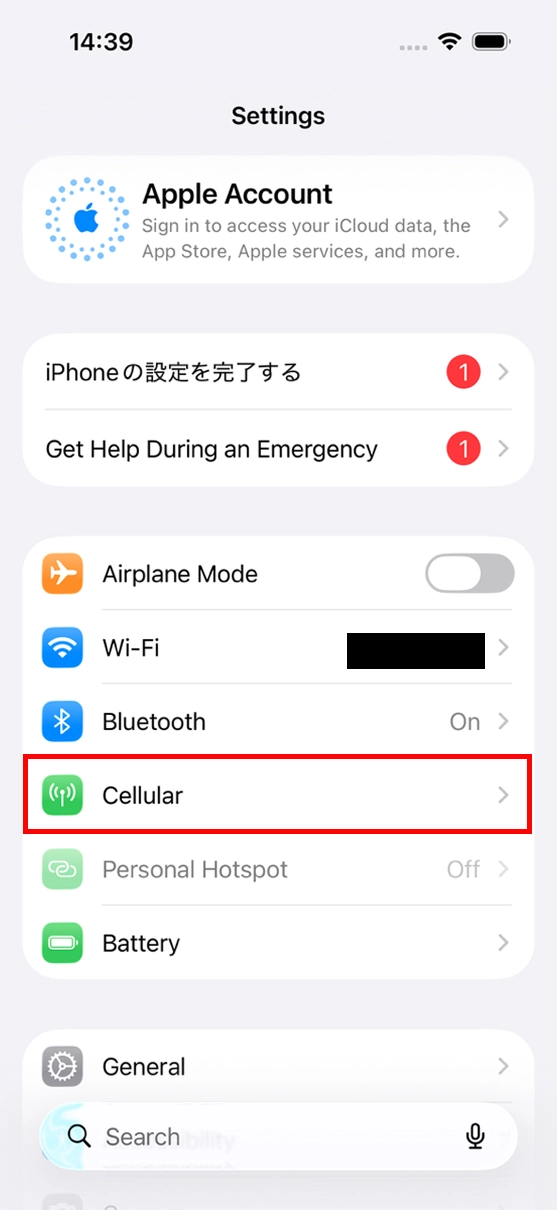
Tap Settings → "Cellular".
STEP12
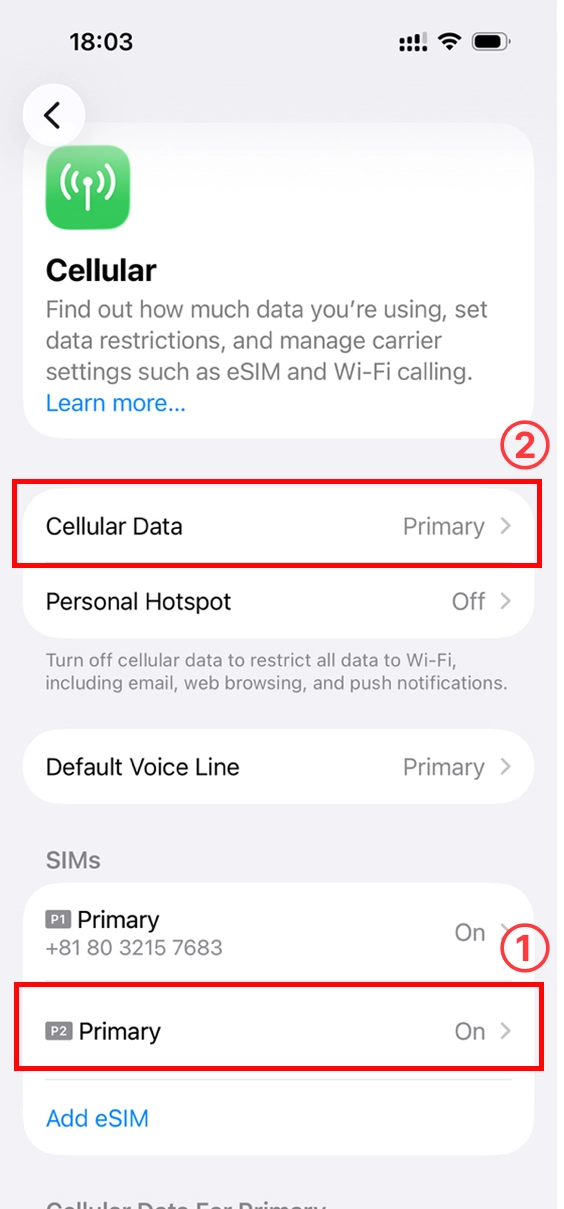
1. Confirm that the added eSIM is on, and turn it on if it is off.
2. Tap "Cellular Data".
STEP13
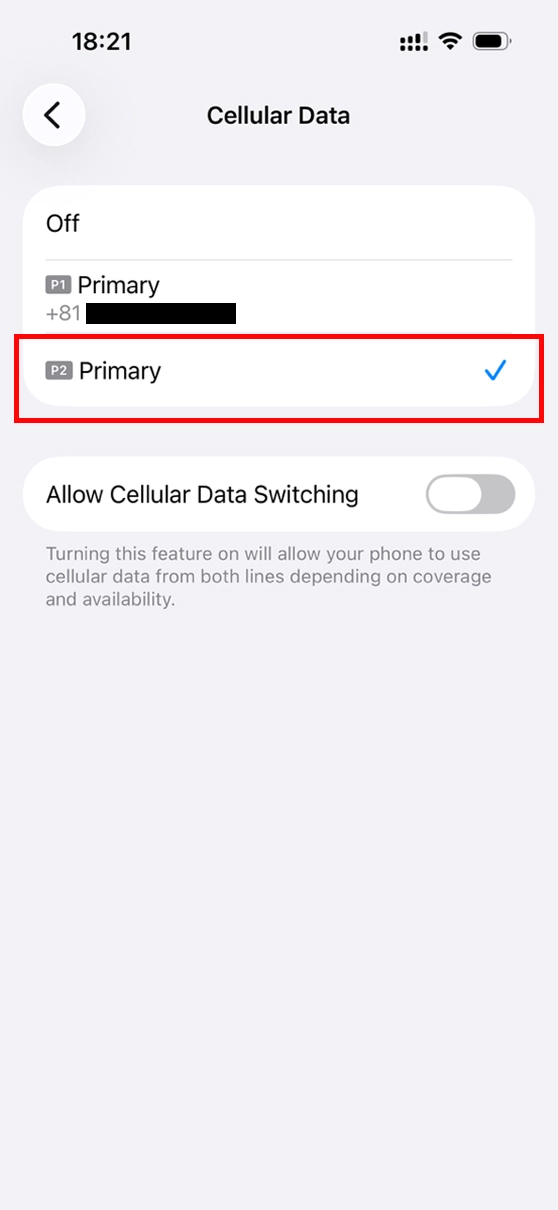
Tap the eSIM you loaded.
STEP14
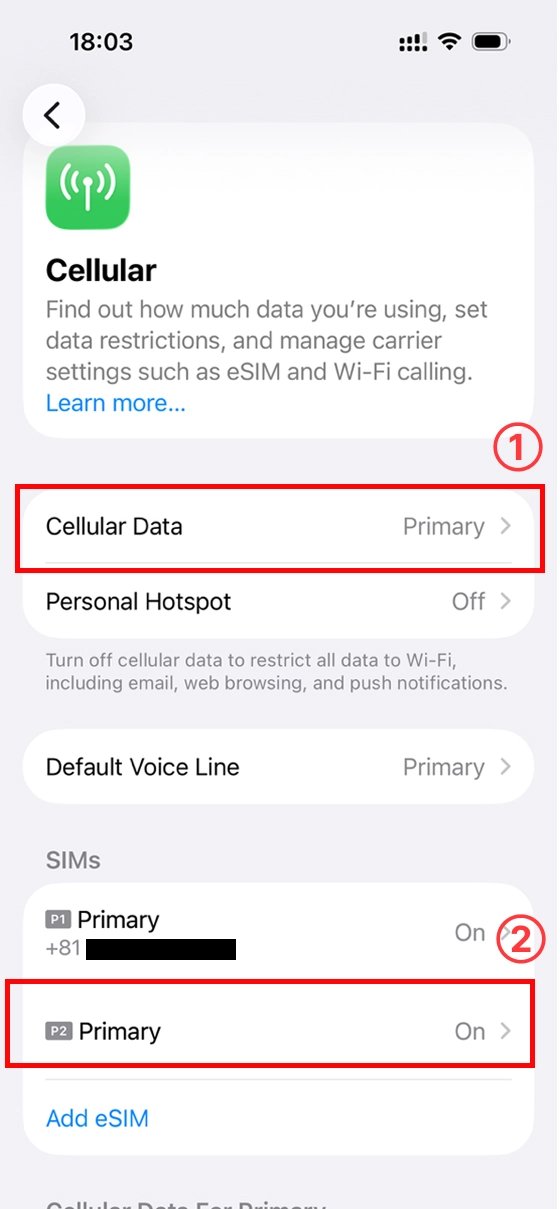
1. Confirm that "Cellular Data" has switched.
2. Tap the eSIM you loaded.
STEP15
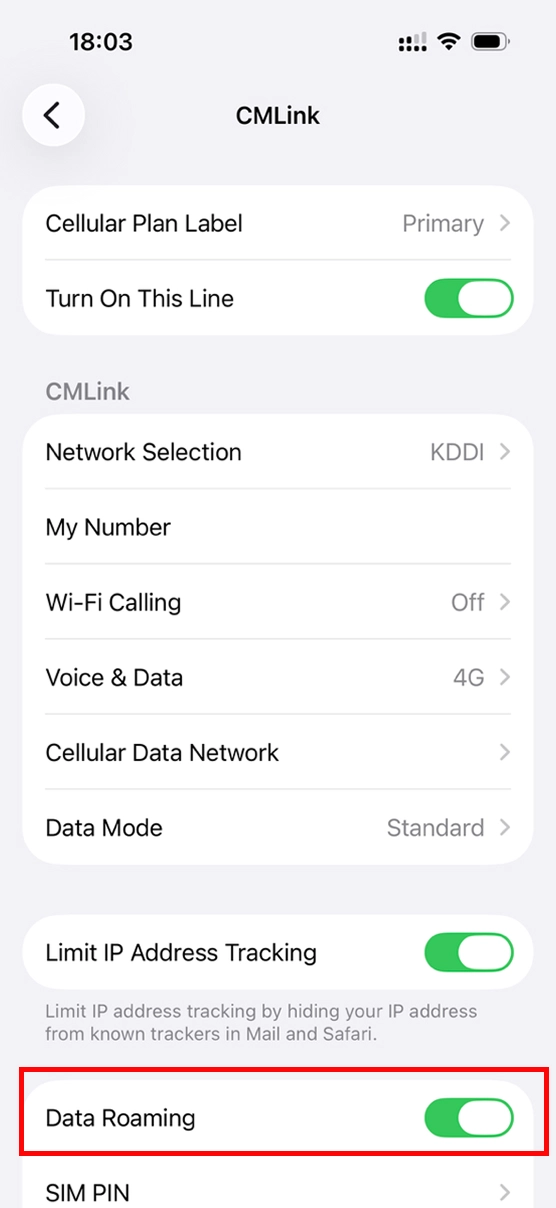
Turn on "Data Roaming" for the eSIM you loaded.
STEP16
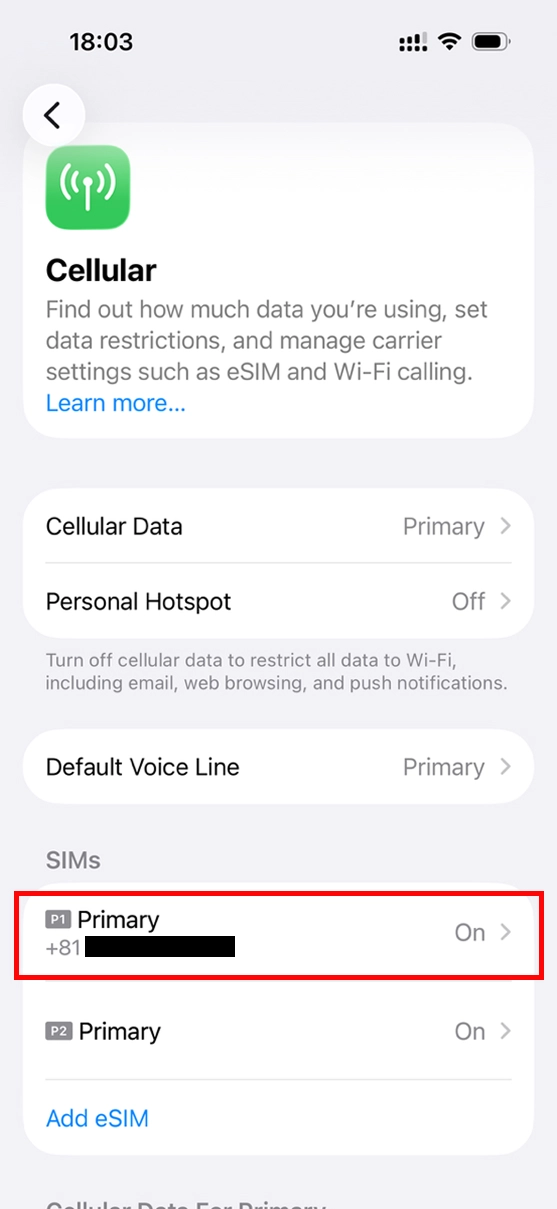
Tap the originally installed eSIM (primary line).
STEP17
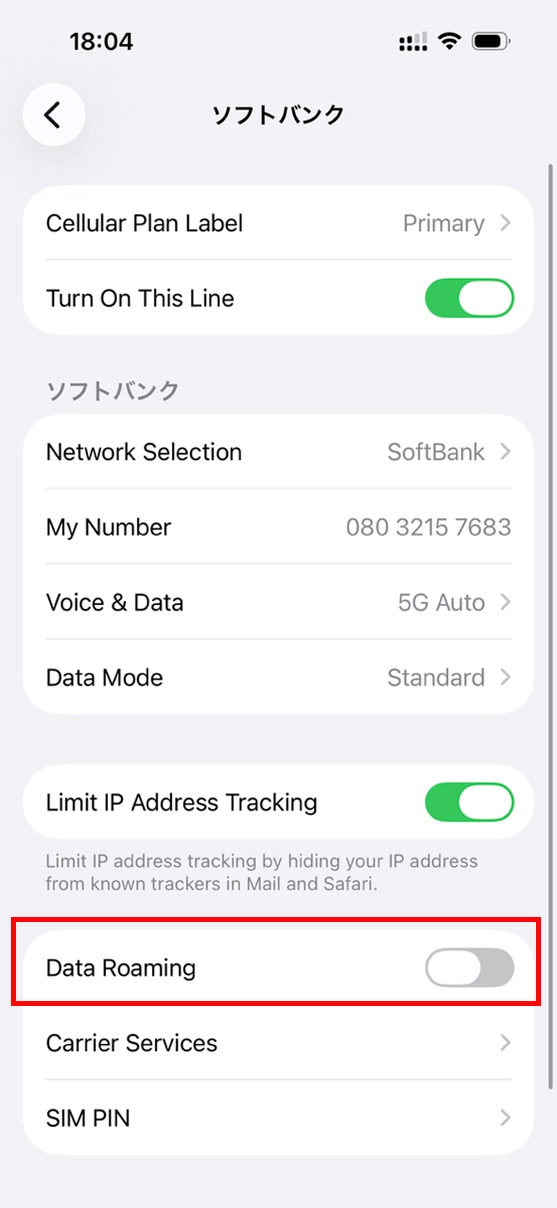
Turn off "Data Roaming". The post-departure setup is now complete.
Troubleshooting
Troubleshooting
1. Signal shows 5G but I can't connect
Please try switching voice + data communication to 4G with the following steps and connecting.
1. Tap "Settings" → "Cellular" → "Cellular Data Options" in order
2. Tap the line you want to use in the "SIM" field
3. Tap "Voice & Data"
4. Tap "4G"
2. A message appears saying the eSIM cannot be added (This code is no longer valid. Contact your carrier for more information.)
The QR code can be used only once. This error occurs on the second and subsequent uses. In most cases the download has already been completed, so please check from "Settings" → "Cellular".
3. Cannot open the internet
Please check that data roaming for the eSIM is ON.
Set up in just 3 minutes with  — ready to use in over 125 countries and regions!
Get an eSIM you can use right away, wherever you go!
Buy an eSIM

 gives you dependable support, so you can enjoy your time abroad.